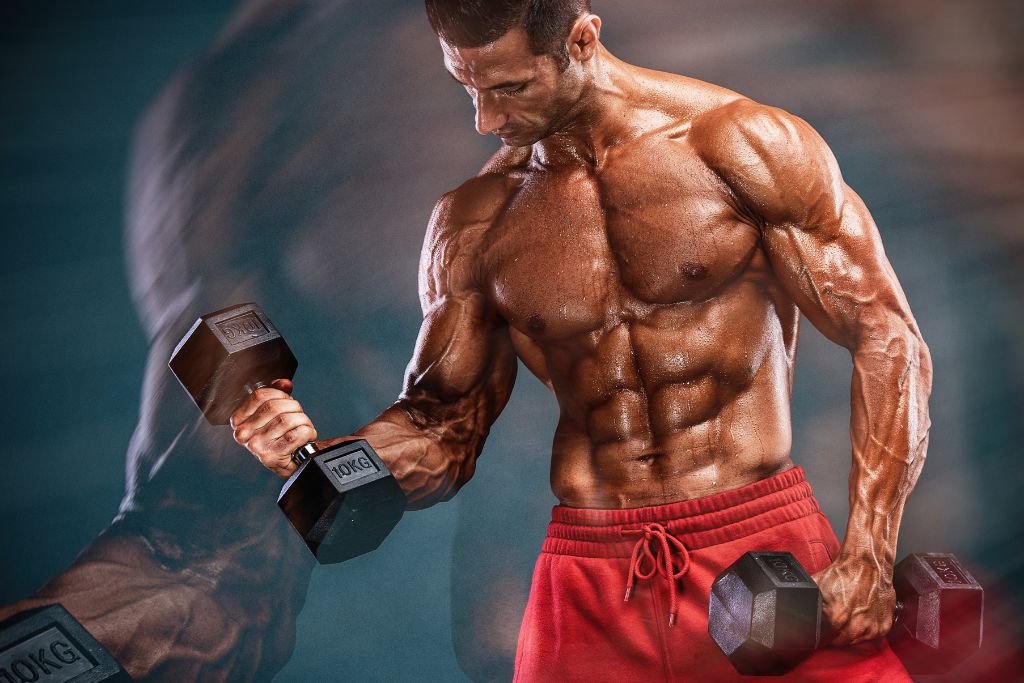
Never before has the fitness industry been so overwhelming. The moves at your disposal are as varied as ever, ranging from isolation exercises to full-body exercises to flows to exercises that help you perfect those other exercises. So what moves are required for you? How do you choose the most effective methods for gaining the desired size, strength, and muscle?
If you’re unsure then this blog is going to help you to fulfil the requirement of your success in getting fit. Multiple exercises have been around for ages for different parts of the body and are frequently performed daily. There isn’t a single best upper-body exercise that perfectly suits every exerciser, but we are confident that we have enough options mentioned in this blog and throughout the website, for everyone to find a workout that meets their needs.
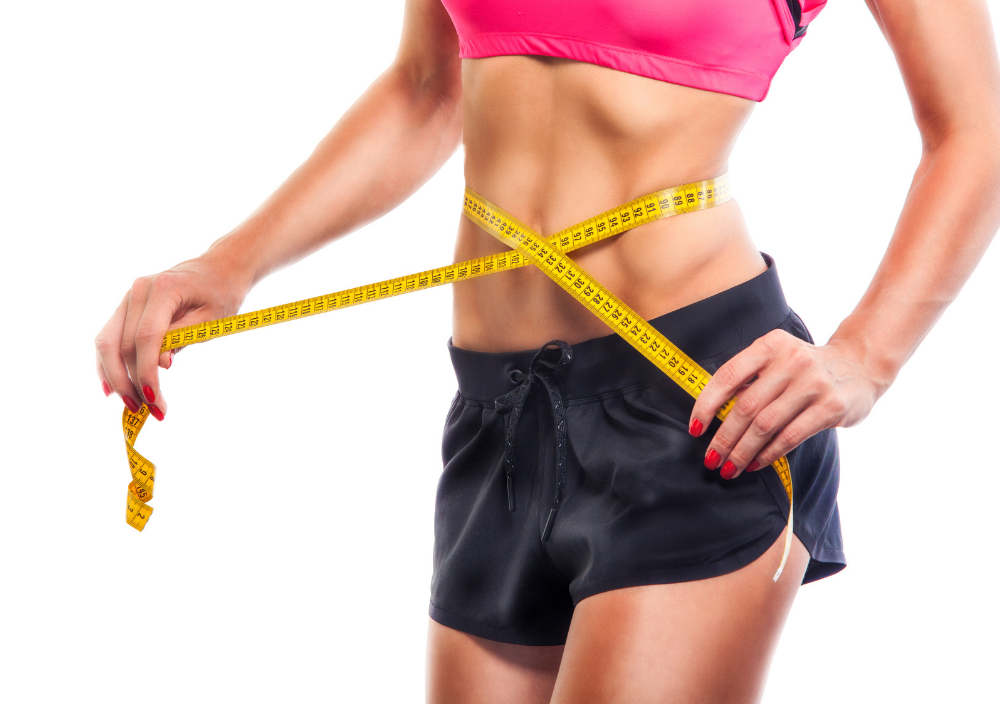
If your current focus is towards strengthening the upper body after regularly visiting the gym’s weight room and having experience using free weights, then we have a 30-day challenge for upper body workouts. This routine targets all of the major upper-body muscle groups and uses a variety of angles and rep ranges to recruit and exhaust as many muscle fibres as possible, allowing for the bigger, stronger muscle fibres to grow back after being fatigued. Also, high-intensity weight training will help you lose extra body fat.
Exercises For Upper Body
We have done our research and created this list of upper-body exercises that will give you a fantastic upper-body strength workout by concentrating on and stimulating muscle growth in your back, biceps, triceps, chest, forearms, and shoulders.
1. Chest Exercises:
Some exercises for chest build-up and strengthening are mentioned below:
Barbell Bench Press
Steps to follow in Barbell Bench Press:
Step 1: Set in Position- To do a barbell bench press, start by lying flat on the horizontal bench with the barbell in your hands. Your feet should be firmly planted on the ground, and you should be facing upwards towards the ceiling.
Step 2: Hold the Bar– Then, grasp the barbell at wider than shoulder width (typically somewhere around where your ring fingers are placed on the rings). Lift the bar off the rack and hold it steady above your chest.
Step 3: Get in Action– To prevent your elbows from extending too far, tuck your shoulder blades behind your back. Additionally, while your body is supported by the backs of your shoulders and your butt, press firmly into the floor with your feet to give your back a little arch.
Step 4: Lift the Bar– While inhaling, lift the bar directly up to the center of your chest, stabilizing throughout by keeping your feet firmly planted on the floor. As you do this, ensure that the bar only travels in an upward direction towards the middle of your chest.
Step 5: Bring the Bar down- When the barbell reaches your chest, use all your power to press it back up while exhaling. Make sure to exhale at the end of each rep for maximum effectiveness.
Result: The Barbell Bench Press is an excellent exercise for building upper body strength, increasing muscle mass in the chest and tricep areas, as well as strengthening bone health and functional strength. When done regularly, you can expect to see these results!
Dumbbell Bench Press
Steps to follow in Dumbbell Bench Press:
Step 1: Set in Position– To perform a dumbbell fly, begin by grabbing a pair of moderate-weight dumbbells. Position yourself on an exercise bench and place the dumbbells in the crease of your hips. Lie back onto the bench, keeping the dumbbells still positioned down by your hips.
Step 2: Hold the Dumbbells– Activate your abdominal muscles, and press the dumbbells towards the ceiling. Make sure your palms are facing forward and spin your shoulders outwards. Keep your upper back firm and secure at all times. Every rep should start from this start position.
Step 3: Lower the Weight– To ensure proper form, maintain a neutral wrist when you lower the dumbbells. Keep going until your upper arms are parallel to your back. Your elbows should be pointed outwards and perpendicular to your body, creating a 90-degree angle between your upper and lower arms. Pause before starting to lift the dumbbells back up for maximum gains.
Step 4: Lift the Weight Up- Start by squeezing your chest and pressing the dumbbells away from you until your arms are extended with a slight bend in the elbows. Slowly release back to the starting position and repeat. As you press, focus on contracting your chest muscles to get the most out of your workout.
Step 5: At the End- At the end of a dumbbell chest press repetition, make sure to squeeze your chest muscles together and maintain the correct distance between the weights until fully extend your arms. This will ensure that you get the most out of each rep!
Result: Doing Dumbbell Bench Presses regularly can help you build your muscles, activate your stabiliser muscles, create balance among your muscles and give you the full range of motion. All these benefits make this exercise ideal for those looking to improve their overall fitness.
Push-Ups
Steps to follow in Push-Ups:
Step 1: Set in Position– To do a Push-Up, start by getting down on the ground in an all-fours position with your hands placed slightly wider than your shoulders. Then, make sure that your elbows have a slight bend and stay off of being fully locked out. Finally, extend your legs towards the back so you are evenly balanced on your hands and toes, with feet being hip-width apart from each other.
Step 2: Get in Action– Once you’ve assumed your desired posture, contract your abdominal muscles and engage your core by drawing your navel towards your spine.
Step 3: Get Down– As you inhale, slowly bend your elbows and allow your body to lower down towards the floor. Keep going until your elbows are at a 90-degree angle.
Step 4: Lift Your Body- As you exhale, engage your chest muscles and press up through your hands to return to the starting point.
Result: Regularly doing push-ups with proper technique can help increase muscular strength, make the joints and bones stronger, fortify the lower back and core, as well as benefit overall cardiovascular health.
Machine Chest Press
Steps to follow in Machine Chest Press:
Step 1: Set in Position– When the weight machine is configured to the desired weight, sit in a comfortable position on the floor. Place your feet firmly apart at a shoulder-width distance, and make sure your arms can reach full extension with your hands level to the ground if the seat is adjustable.
Step 2: Get in Action– When grabbing the machine’s handles, firmly grip them with your thumbs curling around them. Keep your wrists in a relaxed position and make sure they’re in line with your lower arms.
Step 3: Move the Handles– When performing a horizontal push exercise, exhale and push your arms outward until they are fully extended, making sure not to lock the elbows. Your neck should stay still and your head fixed against the back support throughout the motion. Make sure you feel resistance when pushing outwards.
Step 4: Take a Break– Once you have completed the full extensions on an exercise, pause briefly before bending your elbows and returning to the starting position while inhaling.
Result: When done correctly, Machine Chest Press is an excellent exercise to help build muscle and strength in the pectorals, deltoids, triceps and even biceps. It’s also great for targeting the serratus anterior for increased shoulder stability. Doing this exercise regularly can help enhance your look and strength.
Chest Fly
Steps to follow in Chest Fly:
Step 1: Set in Position– To begin your exercise with the dual-cable machine, stand with your feet shoulder-width apart between the two stacks of weight plates. Make sure that the pulleys are set to chest height before you grab hold of either handle.
Step 2: Get in Action– Begin your exercise by standing and extending both arms outward beside your body, palms facing forward. Intensify the exercise by keeping your core tight and back straight as you stretch the cables. Then take a step forward with one foot at a time while maintaining the tension on the cable.
Step 3: Keep in Mind– Make sure your elbows remain in front of your shoulders when you slightly bend them. Be careful not to let them cross behind the shoulders as you bend.
Step 4: Put Efforts– Begin by standing with your feet hip-width apart, facing forward. Bring your hands to chest level and then extend them in front of you in large sweeping motions, eventually bringing the palms of your hands together. Take a moment to feel the sensation before releasing back to the starting position. Be sure to alternate the lead foot in each set.
Result: Doing Chest Fly is an excellent way to build chest muscles, create the perfect shape for your chest, improve posture and shoulder stability, have better contraction of the chest muscles, and increase strength in the biceps and triceps. These are just some of the benefits that this exercise provides.
Dumbbell Pull-Over
Steps to follow in Dumbbell Pull-Over:
Step 1: Set in Position– To get into the proper position on the weight bench, begin by setting yourself on the bench and planting your feet firmly on the floor. Then, slide each foot away from your body to create a sizable gap between you and the weight bench. The gap should be wider than the width of the bench itself.
Step 2: Grab the Dumbbells– Place a pair of dumbbells in your hands and lay back on the bench. Ensure that your head, neck and spine are safely supported by the bench as you roll back.
Step 3: Get Started– With your arms straight out in front of you, just above your chest, bend your elbows slightly. Make sure both palms are facing each other.
Step 4: Get in Action– Begin by taking a deep breath and tightening your abdominal muscles. Using slow, controlled movement, raise the weights slowly towards the back of your head, ensuring that it takes between three to four seconds to reach its destination. Once you have finished lifting the weights, exhale and bring the weights back down onto your chest.
Result: The Dumbbell Pull-Over is an incredibly versatile exercise that provides many benefits, from increased lean muscle mass to improved upper body range of motion. It also strengthens back muscles and engages the core while consuming more calories than other workouts. With its multiple benefits, this exercise proves to be a great way to build strength and improve overall fitness.
2. Back Exercises:
Some exercises for back strengthening are mentioned below:
Deadlift
Steps to follow in Deadlift:
Step 1: Set in Position– Move your butt backwards so that your thighs are above your knees and form a half-squat by bending your knees slightly forward to reach the bar. Then lift your chin up while maintaining a flat, tight back throughout.
Step 2: Get in Action– To begin, inhale deeply and focus on engaging your core and lower back muscles, while keeping your head in line with your spine or slightly forward, as preferred. Additionally, aim to activate your latissimus dorsi muscle groups.
Step 3: Lift the Bar– Begin the lift by firmly pressing your feet into the floor and hinging forward with your hips, ensuring to keep your legs pressed throughout. Move the barbell up against your shins until it reaches just above your knees, then quickly stand tall while keeping a solid core and looking straight ahead.
Step 4: Lower the Bar– As you’re doing this exercise, make sure to hold the bar for at least one to two seconds before bringing it back down towards the floor. Remember not to bend your lower back and breathe out deeply as you do this.
Step 5: Take a Pause– For each repetition of your workout, it is important to pause for a few seconds. This ensures that the barbell is correctly positioned on the ground and that your hips are above your knees and your back remains straight and tight. After pausing, inhale deeply and tense up your core before beginning the next rep.
Result: Doing the Deadlift is beneficial for those looking to increase their muscle strength, improve hip stability and movement, and increase grip strength. By adding this exercise to your routine, you can effectively build up these key components of overall fitness.
Pull-Up
Steps to follow in Pull-Up:
Step 1: Get in Position– Get into position for a pull-up by standing underneath the center of the bar. Reach up and grasp onto the bar with your hands, widen them slightly more than shoulder-width apart and make sure your palms are facing away from you. Keep your arms straight above you as you wrap your fingers around the top of the bar, securing it underneath with your thumbs.
Step 2: Lift Your Body Up– Engage your core muscles and lift your feet off the ground while crossing your ankles. At the same time, slightly raise your chest and pull the bar upwards towards your chin. Make sure your elbows are pointed downward towards your body as you do this. Once you reach the top of the move, pause for a moment before bringing yourself back to the starting position.
Step 3: Lower the Body– After the last repetition, slowly lower your body back to the floor while using proper form and technique to prevent any potential injuries.
Result: Incorporating pull-ups into your daily routine has many benefits, including strengthening back muscles, improving grip strength and aiding in physical health. It can also help to reduce visceral fat levels and is known to be effective in controlling type 2 diabetes. By performing pull-ups regularly, you can positively improve your overall strength and physical well-being.
T-Bar Row
Steps to follow in T-Bar Row:
Step 1: Set in Position– Begin with a lightweight that you’re comfortable with on the machine. Get into position by standing on it and bending forward while keeping hold of the handles, palms facing inward. Pull your shoulders back and lift the weight up with your arms. Move up and down in a controlled motion for a safe yet effective exercise to strengthen your muscles.
Step 2: Get in Action– Ensure that your back is in a relaxed stance, pushing down with your heels to lift the weight. Make sure that your torso is parallel to the floor, and your arms should be kept straight from the shoulders. Using your elbows, make the handles of the weight come close to your body by driving the weights up.
Step 3: Main Focus– Engage the back muscles by contracting them, hold that contraction for a few seconds, and take notice of the sensation of the muscles working.
Step 4: Get Back and Repeat– As you exhale, slowly bring the weight back to its original position while spreading your arms. Maintain the same body position during each repetition and don’t rest the weight on the floor.
Result: Doing T-Bar Rows has several terrific benefits: it not only strengthens the muscles in your upper back but also helps to improve posture and build muscle mass. Additionally, incorporating this exercise into your workout routine can help to increase core stability.
Seated Row
Steps to follow in Seated Row:
Step 1: Set in Position– Proper form is essential when performing cable exercises. Start by sitting on a bench, with your knees bent and your arms stretched out in front of you without bending your lower back. Grab the cable attachment, which can be a bar or triangular handle, firmly with both hands.
Step 2: Get in Action– To perform the rowing exercise properly, start by taking a hold of the handle and pulling it back towards your lower abdomen. Keep your torso in line with your arms as you pull, using just the strength of your muscles and avoiding relying too much on momentum.
Step 3: Main Focus- When doing a back-row exercise, make sure to keep your back straight and focus on the middle and upper back while squeezing your shoulder blades together. Make sure you are also positioning your chest outwards as you row.
Step 4: Get Back and Repeat– Keeping your back straight and hips stretched, return the handle in front of you under tension until you reach full stretch. Then repeat this movement.
Result: Seated Row exercises are an effective way of boosting grip strength, core stability, posture, and upper body strength. This exercise is particularly useful for overall performance in sports and daily activities. It can help athletes achieve their goals while also helping everyday individuals increase their overall health and well-being.
Single-Arm Dumbbell Row
Steps to follow in Single-Arm Dumbbell Row:
Step 1: Set in Position– Start by positioning the flat bench horizontally in front of you. Place one dumbbell on each side of the bench and place your right hand with your right knee over the bench. Keep your back straight and adjust your position so that your stomach is parallel to the bench.
Step 2: Get Started– Holding the left-side dumbbell with your left hand, make sure your palm is facing you.
Step 3: Breathe Out– On the exhale, lift the dumbbell up to your chest while bending your elbow backwards until it forms a 90-degree angle.
Step 4: Breathe In– Taking a deep breath, slowly lower the dumbbell until your arm is completely vertical and your elbow slightly bent.
(Now you have to switch the sides and repeat these 4 steps)
Result: The Single-Arm Dumbbell Row is a great exercise to incorporate into your workout routine. It can help to increase strength in the shoulders and upper arms, improve posture and muscular balance, and also build core stability. Doing this exercise regularly will have many positive effects on the body!
Chest-Supported Row
Steps to follow in Chest-Supported Row:
Step 1: Set in Position– Ensure your chest and torso are supported on the bench without your neck or head. The spine should remain in line so your neck and head stay over the bench. Move your arms out straight downward, tucking in and relaxing the shoulders, then fully steady yourself on the floor with both feet.
Step 2: Get in Action- When performing a seated dumbbell row, make sure to start with your palms facing each other. Then, engage the muscles in your back by pulling the weights up towards your ribcage and lifting the upper chest slightly off the bench. Ensure that your elbows stay close to your body as you pull them back – not out towards the sides. Also, pay attention to pressing your shoulder blades together tightly without any movement in the head or neck position.
Step 3: Relax your Shoulder Blades- Compress your shoulder blades inwards as much as you can and then relax them gradually, letting your arms drop back. Your chest should come to rest on the bench and you can go again for the next repetition.
Result: Doing the Chest-Supported Row exercise can have many benefits: it strengthens the upper body, promotes good shoulder health, has a desirable effect on posture, increases muscle size and definition, and even helps with fat loss. All of these are reasons why this is a great exercise to add to any fitness routine.
3. Biceps Exercises:
Some exercises for biceps strengthening and build-up are mentioned below:
Cable Curl
Steps to follow in Cable Curl :
Step 1: Set in Position- When performing cable grip exercises, ensure that your hands and arms are extended fully yet you still have a good grip on the cable. Make sure that your feet are firmly planted on the ground, your knees slightly bent, and your abdominal muscles are as tight as possible. Lastly, keep a straight back with your head facing forward.
Step 2: Get in Action- While exhaling and keeping your elbows and upper arms fixed in place, curl the cable weight up towards your chest. Move only the forearms rising from the elbow, curling the bar as close to your shoulders as you can.
Step 3: Lower the Forearms– Inhale as you bring your arms down, keeping the weights away from their stack. Allow your arms to stop just before they reach the stack, then return them back to their starting position. Repeat this movement for desired reps.
Result: Cable Curls offer several advantages for strength training. This exercise helps to build the peak of the biceps and improve grip strength. Additionally, it is beneficial for the biceps, forearms, brachialis, and brachioradialis muscles as well. Doing these curls regularly can help you achieve an impressive physique.
Dumbbell Curl
Steps to follow in Dumbbell Curl:
Step 1: Set in Position- To begin this exercise, grab a dumbbell in each hand. Position your elbows at your sides with your forearms extended in front of you. Make sure to keep knees slightly bent, stomach straight, and spine upright.
Step 2: Get in Action- As you exhale, take the dumbbells up to your shoulders, keeping your elbows close to the sides of your body. Depending on how much weight you can lift, you can either stop at your shoulders or bring the weights up to eye level or even higher above your forehead.
Step 3: Lower the Weights– To complete this exercise, lower the dumbbells to their starting position. Repeat this motion as many times as desired to reach your desired number of repetitions (reps).
Result: Doing the Dumbbell Curl regularly has a myriad of benefits, such as helping to build strength in the arms and improving muscle tone in both the arms and core. Through the consistent performance of this particular exercise, you will notice that there is increased upper body strength, better arm muscles and heightened core muscle development.
Reverse-Grip Barbell Row
Steps to follow in Reverse-Grip Barbell Row:
Step 1: Set in Position– Get into the starting position for a bent-over row by standing with your feet shoulder-width apart. Grasp the barbell with an underhand grip that is wider than shoulder width, and let the bar hang down from your shoulders. Make sure that your back remains arched; bend your hips and knees as you lower your torso until it is nearly parallel to the floor.
Step 2: Get in Action– As you lift the barbell, make sure to keep it close to your body and your elbows tucked in. Continue lifting until the barbell is at chest level or below and keep in mind that it should not apply extra force on your biceps as opposed to simply holding the weight.
Step 3: Hold the Position– After you have finished pushing your shoulder blades and back muscles to the top of your motion, maintain that position for a brief period.
Step 4: Lower the Weight- After performing the desired reps, slowly lower the barbell back to its starting position and then repeat the reps as many times as you would like.
Result: Reverse-Grip Barbell Row is beneficial for the back, as it helps strengthen and build the lats, rhomboids, lower back and biceps muscles. Plus, it’s an effective way to target all of the muscles in the back.
Hammer Curl
Steps to follow in Hammer Curl:
Step 1: Set in Position– Start in a standing position with your knees underneath your hips, legs slightly apart and palms facing your thighs. Keep your shoulders relaxed and hold a dumbbell in each hand. Be sure to keep the dumbbells close to the side of your body such that they don’t pass your upper thighs or get too far away from them.
Step 2: Get in Action– lift your lower arms up to move the dumbbells towards your shoulders. Keep your upper arm fixed while the wrists are in line with your forearms.
Step 3: Hold the Position– To move the dumbbells up to your shoulders, lift your lower arms while keeping your upper arm and wrists in one fixed line. Make sure that the wrists are in line with the forearms before continuing.
Step 4: Lower the Weight– Now, gently lower the dumbbells back to the starting point and repeat the action according to how many sets you want.
Result: Hammer curl is a great exercise for working your biceps, as it helps with their growth and development. It also improves grip strength and stability of the wrists, as well as increases muscle endurance. Doing hammer curls regularly will help you achieve a strong, toned bicep.
Incline Curl
Steps to follow in Incline Curl:
Step 1: Set in Position– To begin, position your bench at an incline angle of 45-60 degrees. Take hold of a set of dumbbells and sit facing away from the bench with arms hanging by your sides and palms pointing forward. Maintain this head and neck posture throughout the exercise and be sure to keep your chin tucked in.
Step 2: Get in Action- While keeping your upper arms stationary, flex your biceps by lowering your lower arms until they make contact with your upper arms. It’s important to remember that the weights should be close to your shoulders but not actually touch them.
Step 3: Hold the Position– Engage your biceps by pressing them towards each other to keep your arms in this pose for a second.
Step 4: Lower the Weight- When doing a rep, keep your upper arms still and slowly straighten your elbows until they reach the starting position. Repeat as many times as desired to complete the exercise.
Result: Doing an Incline Curl has immense benefits to both your arms and biceps. Not only will it increase the size of your biceps, but it will also improve your range of motion, strengthen your muscles, and build up more position tolerance and the capacity of connective tissue to muscle joints.
Preacher Curl
Steps to follow in Preacher Curl:
Step 1: Set in Position- To perform a preacher curl with an underhand grip, sit on the Preacher Curl bench with your feet resting on the floor. Adjust the seat so that your upper arms and chest are firmly connected to the arm pad. When performing the exercise, make sure to keep your chin tucked in and extend your arms straight by slightly bending your elbow. Every repetition of the preacher curl must start from this position.
Step 2: Get in Action– Make sure that your upper arms remain in contact with the arm pad of the weight bench, then start exercising by using your biceps to press up while bending your elbows. Keep pressing until the barbell is at shoulder level.
Step 3: Release the Lift- To lower the weight during a bicep curl, extend your elbows slowly so that the weight arrives at its starting point.
Result: The Preacher Curl is a great exercise for helping to build up your biceps and stimulate muscle growth. When performing the exercise, you’ll be actively focusing on the negative part of the movement, which puts more pressure on your biceps. This being said, it’s beneficial in helping to grow and shape your arm muscles over time.
4. Triceps Exercises
Some exercises for biceps strengthening and build-up are mentioned below:
Skullcrusher
Steps to follow in Skullcrusher:
Step 1: Set in Position– Begin by sitting down on a bench with the barbell resting in your lap. Make sure to grip the barbell at shoulder-width, with your palms facing down and wrists straight. Then, lean back against the bench and bring the barbell up into position above your collarbone.
Step 2: Get in Action- To perform the exercise, keep your shoulder fixed in position as you slowly bend your elbows and move the weight of the barbell down until it is slightly below your head. Your elbows should stay pointed straight to the front as you lower them.
Step 3: Hold the Position– Start by holding a weight of your desired load in an overhead position. Make sure that your humerus bone is fixed during the entire exercise. Keeping your elbows close to the body and extending them, slowly lower the weight back until it reaches shoulder height. Hold this position for 1 to 2 seconds and then return back to the starting point in a controlled manner. Repeat as per your desired reps.
Result: Doing the Skullcrusher is a great way to strengthen and tone your triceps, while also improving flexibility in the elbow joint. By incorporating this exercise into your workout routine, you can reap all of its amazing benefits and improve your strength, power and endurance during various types of activities.
Close-Grip Bench Press
Steps to follow in Close-Grip Bench Press:
Step 1: Set in Position– Sit down on a flat bench and position your feet firmly on the ground while ensuring your shoulders remain in a neutral position. Securely grasp the barbell, so your hands are slightly more than shoulder-width apart.
Step 2: Get in Action– Inhale deeply and, while maintaining tension from your feet to your core to your arms, grasp the weight bar firmly and lift it up off its support stand. Maintaining a stiff arm posture, move the bar forward above your shoulders until it’s centered on them.
Step 3: Lower the Weight- To move the weight towards your torso, line up your elbows directly beneath your wrists. Keep your elbows close to your body and make sure not to curve your wrists back while lifting. This will ensure that the correct form is maintained throughout the exercise.
Step 4: Get to Starting Position- Once you have lowered yourself to a comfortable depth in your repetition, bring the weight back up while keeping your wrist straight above your elbows at all times.
Result: The Close-Grip Bench Press is an effective exercise to increase tricep strength, improve lockouts during bench press, and alleviate stress on the elbows and shoulders. Practicing the Close-Grip Bench Press can give you all of these benefits.
Dumbbell Overhead Triceps Extension
Steps to follow in Dumbbell Overhead Triceps Extension:
Step 1: Set in Position– While in an upright standing position, take a single dumbbell in both hands. Keep your palms facing each other and raise the weight up above your head.
Step 2: Get in Action– Keep your upper arms still and lower the weight behind your head. Doing this will help to engage the right muscle groups and ensure you get the most out of the exercise.
Step 3: Back to Position- When performing an exercise, make sure to move the weight back to its initial position until your arms are fully extended. Additionally, be sure to switch the positioning of your forward foot for each set.
Result: Doing the Dumbbell Overhead Triceps Extension has various benefits, such as strengthening your triceps muscles, promoting stability in your shoulders and arms, and enhancing your level of flexibility.
Triceps Machine Dip
Steps to follow in Triceps Machine Dip:
Step 1: Set in Position- Start the dip exercise by sitting on the dip machine and setting the desired weight. Firmly hold onto the handles and keep your elbows close to your body, forming a 90-degree angle.
Step 2: Get in Action- When you exhale, curl your triceps and extend your arms. Make sure to keep a slight bend in the arms so that the tension is still on your triceps muscles.
Step 3: Back to Position– After completing the initial rep, inhale and slowly bring your arms back to their original starting position. Repeat this rep as many times as you intend to according to personal preference.
Result: The Triceps Machine Dip is an effective exercise for targeting and building the triceps brachii muscles, as well as for strengthening the arms, shoulders, and chest. This exercise allows you to work the triceps muscle effectively while also improving strength and stability in these areas. It’s a great way to safely target your body’s major muscle groups in one go.
Board Press
Steps to follow in Board Press:
Step 1: Set in Position– Begin seated on a flat bench, holding the barbell carefully over your head. Slowly lower yourself backwards until you are lying supine on the bench, maintaining control of the weight the entire time.
Step 2: Get in Action- To ensure your safety, it is recommended to have someone with you to help place the boards (of whatever weight you wish) on top of your chest.
Step 3: Lower the Weight- Starting from the starting position, slowly lower the barbell until it lightly touches the top of the boards. Then, using your muscles push and raise the weight back to its starting position. Repeat this sequence as many times as you choose.
Result: The Board Press exercise is one of the best ways to develop increased bench press strength and intensity without having to worry about overstressing your shoulder muscles. Furthermore, it gives you the freedom to work on specific ranges within your motion while offering a lower-intensity option. All these advantages make the Board Press an essential part of any serious powerlifter’s fitness routine.
Cable Push-Down
Steps to follow in Cable Push-Down:
Step 1: Set in Position- Position yourself in front of the tricep pushdown cable machine and firmly hold the cable bar with both hands using an overhand grip. Ensure that the bar grips are adjusted to the proper level for your chest. Maintain your elbows firmly at your side, then step back with both feet, a bit wider than hip-width apart for added balance.
Step 2: Get in Action- When pushing down the bar during a breath-in, do not lock your elbows straight. Instead, only stretch your elbows to a locked position while keeping them close to your body. Bend your knees slightly and try to keep your back straight while resisting the urge to arch forward.
Step 3: Back to Position- Exhale as you come back to the starting position and repeat this rep as desired.
Result: The Cable Push-Down is a great exercise for strengthening the upper body and specifically, your triceps. The motion involved with the Cable Push-Down helps to strengthen muscles, improve balance, and correct any muscle imbalances in the arms. These benefits will help you become strong and perform everyday tasks with ease.
5. Shoulders Exercises
Push-Press
Following are the steps to follow in Push-Press:
Step 1: Set in Position- While standing with your feet shoulder-width apart, bend your elbows forward and grip the bar with your fingers. Continue by positioning the bar so that it rests on your collarbone in front of your shoulder.
Step 2: Get in Action- Squat down while holding the bar in front of your shoulder. Push through the feet and begin straightening your legs while gathering momentum.
Step 3: Lift The Bar- Once you’ve gained momentum, lift the bar up while adjusting your head just a little to make room for it. Extend your arm straight up to complete another cycle while keeping your spine aligned with the rest of your body.
Results: A push press workout helps build your upper and lower body strength. By working on muscles including the glutes, triceps, quadriceps, and pecs as well as the deltoids and rotator cuff muscles, this exercise aids in developing shoulder strength. A push press workout helps build your upper and lower body strength.
Military Press
Following are the steps to follow in Military Press:
Step 1: Set in Position- Start by racking the bar at the height of your mid-chest. Hold the bar slightly wider than your shoulder with your palm facing the front.
Step 2: Get in Action- Bend your knees in a quarter squat position while standing close to the bar. Drive up your legs to stand and remove the bar from the rack support. Move backwards a few steps so you have room to raise the bar.
Step 3: Maintain The Position: Raise the bar directly over your head while extending your arms, then try to hold the position for one second. If you find yourself straining to maintain your back straight, it might be because you are carrying too much weight.
Step 4: Repeat Steps: Take a deep breath as you gradually lower the bar back to your chest and exhale while raising the bar over your head again. Repeat the steps to complete the set.
Results: Military press also referred to as overhead press exercise helps in toning and strengthening the shoulder and triceps muscles. Along with upper body muscle building. This workout empowers core muscles including the lower back, obliques, and transverse abdominal muscles. Additionally, if you are performing this training in a standing position, the military press helps in stabilizing your spinal cord.
Rear Delt Row
Following are the steps to follow in Rear Delt Row:
Step 1: Set in Position- Place the loaded barbell on the floor in front of you while standing against it. Then, hunch over and place your feet slightly shoulder-width apart.
Step 2: Get in Action- Spread your back out parallel to the ground and let your arms hang straight down. Then, take an overhand grip on the bar keeping it a little wider from your shoulder. Keep your back straight and parallel to the ground as you pull the bar straight up until it touches your mid-chest.
Step 3: Repeat Steps: Reverse the action and go back to the starting position. Make sure the barbell doesn’t collapse to its initial position instead, try lowering it gradually.
Results: It is a highly effective and useful exercise for strengthening and adding muscle to the posterior deltoids. The rear delt row may be performed in a variety of methods using dumbbells, a barbell, or a cable machine. Rear delt row training can boost your strength, stability, and balance while giving your shoulder a broader, fuller appearance.
Seated Dumbbell Press
Following are the steps to follow in Seated Dumbbell Press:
Step 1: Set in Position- To begin, choose the required weight from the rack, then adjust the bench positioning to 90 degrees. Use a neutral grip to pick up the dumbbells from the ground (palms facing in). Put the dumbbell’s end on your knees and sit on the bench.
Step 2: Get in Action- Hold the dumbbells at your shoulders with your hands facing front and your elbows out to the sides. After securing the dumbbells in place, turn your palms so they are facing forward.
Step 3: Hold the Process- Exhale, then lift the dumbbells straight up and hold them there for a count of one to two seconds. Gradually return the dumbbells to their initial position. And repeat the process to complete the desired number of sets.
Results: The arms, shoulders, chest, core, and abs are all strengthened during the overhead dumbbell press, which helps build upper body strength. When performing overhead lifts with dumbbells each side works individually, which is excellent for building both sides equally. This exercise is performed in a seated position, removing work of the lower body. Hence you can concentrate solely on the shoulders.
Arnold Press
Step 1: Set in Position- Pick up two dumbbells, place them shoulder-width apart, and stand up straight. Grip the ground with both of your feet to develop a secure foot posture.
Step 2: Get in Action- Hold the dumbbells just over your shoulders while bending your elbows and pointing them toward the floor with your palms toward your body. Push the dumbbells up while extending your arms fully and turning your palms outward so they are facing forward.
Step 3: Maintain The Position: Rotate your hand’s position inward as you drop the dumbbells back to the starting position. Continue till the set is finished.
Results: Arnold press is an advanced version of the shoulder press. In comparison to other shoulder press workouts, Arnold’s press focuses on the front deltoids and trapezius muscles in the best possible manner. Regular shoulder muscle training also has other advantages, such as helping you carry bigger objects in the real world and maintaining your shoulder in good shape.
Front Raise
Following are the steps to follow in Front Raise:
Step 1: Set in Position- To begin, hold the dumbbells while standing upright. Your hands should be facing down and the dumbbells should be in front of your thighs.
Step 2: Get in Action- While inhaling, raise the dumbbells upward. Stretch your arm until they are parallel to the ground with your elbow slightly bent, to lessen the strain on your joints.
Step 3: Repeat Steps: Return to the starting position after lowering the dumbbells. Continue with the desired number of sets.
Results: The front raise dumbbell exercise is beneficial for strengthening your shoulders, particularly the front delts. Your shoulder’s size and tone can be increased by engaging your anterior deltoids. It further aids in building upper body strength by engaging other muscular groups, like the trapezius, biceps, and triceps in your arms.
6. Traps
The Shrug
Following are the steps to follow in The Shrug:
Step 1: Set in Position- With your legs shoulder-width apart, stand straight while holding dumbbells in both of your hands. Your arms should be straight with your palm facing your body.
Step 2: Get in Action- Slightly bend your knees, keep your chin up, look straight then raise your shoulders and outstretch them towards your ears.
Step 3: Back to Original Position- Once you reach the final movement hold them there for a couple of seconds and lower down your shoulder to the original position. Repeat the process in up and down movements.
Result: Shrugs specifically aim at strengthening the trapezius muscles located at the back of your neck. This exercise helps in maintaining the right posture along with making your day-to-day movement efficient such as lifting, extending arms, and bending. Additionally, shrugs aid in enhancing control and stability of your neck and upper back.
The High Pull
Following are the steps to follow in High Pull:
Step 1: Set in Position- Stand with your feet shoulder-width apart, and hold the barbell with an overhand griping in front of your legs. While holding the barbell maintain a slightly arched back and balance on your midfoot.
Step 2: Get in Action- Extend your hips explosively and lift the barbell as high as you possibly can. Slowly return back to the starting position.
Step 3: Repeat Steps: Repeat the steps.
Result: The high-pull exercise requires your entire body to operate. Your rhomboids, glute, and hamstring muscles are worked out when you perform high-pull exercises. This workout also helps you in strengthening your shoulder, arms, and back muscles while contributing to improving one’s posture, balance, and core strength.
Single-Arm Dumbbell Upright Row
Following are the steps to follow in the single-Arm Dumbbell Upright Row:
Step 1: Set in Position- Stand while holding a dumbbell in one hand with an overhand grip and your feet’s shoulder width apart. Place the dumbbell on your thighs with your palm facing downwards and your elbow slightly bent.
Step 2: Get in Action- Before you begin, tighten your hips and shoulder while looking straight ahead then slowly start by lifting the dumbbells till it reaches your chest level.
Step 3: Repeat Steps: Pause for the movement and gradually bring the dumbbells to the initial point. Continue with the desired number of sets and repeat with the other arm.
Result: Single Arm dumbbell exercise helps in strengthening your shoulder, biceps, and lower and upper back by activating the major shoulder muscles. For those who hunch when walking and sitting, this exercise can benefit in improving posture while boosting core stability. Additionally, a well-implemented one-arm dumbbell row helps in building a solid back, making it simpler for you to carry out daily tasks like lifting and bending with less effort.
Modified Bent-Over Duel Cable Low Pulley Shoulder Fly
Following are the steps to follow Bent-Over Duel Cable Low Pulley Shoulder Fly:
Step 1: Set in Position- Start by setting the pair of cables at the bottom of the pulley machine. Grip the cable with your arms hanging down in a slight bend position, so that your body is aligned parallel to the ground.
Step 2: Get in Action- Pull the handles out while keeping the elbows moderately bent and extend them until you get a good press at the upper motion without compressing it excessively.
Step 3: Repeat Steps: Gradually bring the handles to their initial position. Complete the exercise the desired number of times and repeat for the other arm.
Result: This exercise aims at shoulder muscles which further promotes good posture, upper body strength, and shoulder stability. Our traps and rhomboid muscles are responsible for supporting our back and maintaining good posture. This low pulley shoulder fly workout can help you in strengthening those muscles and aid in reducing the possibility of back-related issues.
Low-Cable Face Pull
Following are the steps to follow in Low-Cable Face Pull:
To perform a Low Cable Face Pull start by taking a rope and joining it to the lower portion of the cable rack. Place yourself approximately two feet away from the attachment to get the ideal angle for engaging those traps. Don’t stop or rest at the top motion if you want to utilize the exercise. The workout will get extreme but try to persevere and finish.
Result: The Low cable face pulls exercise targets mainly your shoulder joints, the rear delts and rotator cuff muscles. It helps in building upper body strength along with providing a toned and thick upper back. This pulling and pressing exercise can aid in making your daily task effortless such as lifting and reaching high shelves etc.
Final Words
For anyone looking to improve their overall fitness and well-being, upper body training is a great step to start. Strengthening the muscles in your arms, back, chest, and shoulders can lead to increased muscle strength and endurance, improved calorie-burning capacity, lower risk of injury, and stronger bones. All of these are important components of a well-rounded exercise regimen. So we hope that you can get the best results with our mentioned upper body exercises.